SQL Server Database in “Recovery Pending“ Status

Due to temporary disk availability issue, SQL Server database is in “Recovery Pending“ Status.

Recovery Pending

Let’s step by step repair the database by the following guidelines:

  • Make sure disks are available and with enough space for databases.
  • Make a backup of datafiles and logfiles. In case repairing failure, so the alternative repairing methods can be used later against database restoration from this backup.
  • Manually set database online.
  • Run CheckDB.
DBCC CHECKDB

You can run CHECKDB with option ‘NO_INFOMSGS’ to eliminate the informational messages.

DBCC CHECKDB ('TestDatabase') WITH NO_INFOMSGS;

In this case, CheckDB has completed without warning, so the database is healthy. Otherwise continue to repair the database.

• Set to single user mode for databases to be repaired.

ALTER DATABASE TestDatabase SET SINGLE_USER;

• Start to repair the database.

First try “REPAIR_REBUILD” option.

DBCC CHECKDB('TestDatabase',REPAIR_REBUILD)

The repaired database can be se to multiple user mode now, if it is successful.
Otherwise continue to repair with level ‘REPAIR_ALLOW_DATA_LOSS’.

DBCC CHECKDB(‘TestDatabase’,REPAIR_ALLOW_DATA_LOSS); 

Please note the option name explains the potential data loss could happen.

If the repairing is successful, the database can be set back to multiple user status to open to users.

If the repairing is still a failure, then continue to next step for repairing with ‘EMERGENCY’ mode.

ALTER DATABASE TestDatabase SET EMERGENCY;
ALTER DATABASE TestDatabase SET SINGLE_USER;
DBCC CHECKDB ('TestDatabase',REPAIR_ALLOW_DATA_LOSS) WITH  NO_INFOMSGS,ALL_ERRORMSGS;

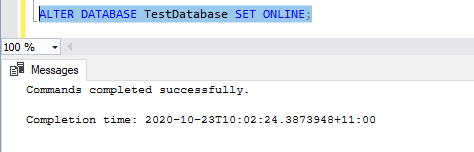
Finally set database to ‘online’ and multiple user mode.

ALTER DATABASE TestDatabase SET ONLINE;
ALTER DATABASE TestDatabase SET MULTI_USER;

Let’s check database online and normal now.

Advertisement

How to Move SQL Database Files to New Location

Move Database Files By SQL Script

1) Get database files details.

SELECT name, physical_name AS NewLocation, state_desc AS OnlineStatus
FROM sys.master_files
WHERE database_id = DB_ID(N'TestDatabase')
GO

2) Run the following SQL script to set a new location for SQL database files.

ALTER DATABASE TestDatabase   
    MODIFY FILE ( NAME = TestDatabase,   
                  FILENAME = 'C:\MSSQLDB\MSSQL15.MSSQLNODE1INST1\UserDB\Data\TestDatabase.mdf');  
GO
 
ALTER DATABASE TestDatabase   
    MODIFY FILE ( NAME = TestDatabase_log,   
                  FILENAME = 'C:\MSSQLDB\MSSQL15.MSSQLNODE1INST1\UserDB\Log\TestDatabase_log.ldf');  
GO

3) Run the following SQL script to take SQL database offline:

ALTER DATABASE TestDatabase SET OFFLINE; 
 GO

4) Move mdf and ldf files to the new location specified in the statement of step2.

5) Now database can be set online by running the following query.

ALTER DATABASE TestDatabase SET ONLINE;  
GO

6) To verify the results by running the following query.

SELECT name, physical_name AS NewLocation, state_desc AS OnlineStatus
FROM sys.master_files
WHERE database_id = DB_ID(N'TestDatabase')
GO

Move Database Files By using Detach and Attach Function

  1. Launch SSMS.
  2. Login to the SQL instance with an account that has the SysAdmin server role.
  3. Navigate to “Databases“.
  4. Right click the database that files to be moved to new location.
  5. Select “Properties“.
  6. In the Properties window, in the Select a Page panel, click “Files“.
  7. Record down the paths and filenames for the database.
  8. Click “OK”.
  9. Right click the same database again.
  10. Select “Tasks “, then click “Detach“.
  11. In the Detach Database window, check the box “Drop Connections“.
  12. Click “OK“.
  13. Launch Windows Explorer.
  14. Browse to the path recorded in step 7.
  15. Move the database’s files to the new location.
  16. Record down the paths where you have just moved the files to.
  17. Return to SSMS again.
  18. Right click “Databases
  19. Select “Attach“.
  20. In the Attach Databases window, click “Add“.
  21. Browse to the path you wrote down in step 16.
  22. Select the .mdf filename for the database.
  23. Click “OK”.
  24. If the other files are not found, click the ellipsis next to the filename that is not found.
  25. In the Locate Database Files window, “browse” to the location of the file for the database that you wrote down in step 16.
  26. Select the file.
  27. Click “OK”.
  28. In the Attach Databases window, click “OK”.